It's about exploring and sharing my creative adventures (mostly sewing these days) ~
~those activities that sometimes obsess, usually inspire, occasionally frustrate
~and always provide a delightful maze to wander through.

Monday, December 31, 2012

Thank You 2012 :)

I'm too lazy/disorganized/easily distracted to do a detailed end-of-the-year wrap up, (even though I love reading about all of yours!) so I'll just post a few faves of my sewing endeavors from this past year - a year of challenges, rewards, loss, growth, and gratitude :)

(Edited to add my #1 favorite make of the year - HOW could I have missed this one???)
My Koos Coat!
Top of this list, this one is...
it gets a LOT of wear!
(told you I was disorganized/easily distracted......)


Marcy Tilton Jacket

Bustles! (and a foray into selling on Etsy!)

Au Bonheur!

TNT Zip Tees

Tablecloth skirt ala Shams :)

And the Newbie in the closet :)

And for 2013 I have an empty jar.   Ready to be filled with little notes citing the inspirational, laugh-inducing, blessing-filled, growth-oriented, and otherwise memorable events of the coming year.   I'll open and read them at the end of year in ceremony and thankfulness.


Right now, I am thankful for all of you - my readers, my fellow sewists and bloggers, my inspiration.   How lucky am I to have found all of you in my new-found path on this sewing journey!

Here's to a 2013 that is abundant with gratitude for all of us :) 

Sunday, December 30, 2012

Bring on the Rain! (The Soho Raincoat)

The Good News:  The Soho Raincoat is DONE!
The Better News:  I'm delighted with the results :)

The back story:  Last winter I made up the Sewing Workshop Soho Coat pattern in a robe, blogged about here.  I already knew that I wanted to make a raincoat out of this luscious deep purple pleated fabric scored from Fabrix,

but I could not get past how to work with all those micro pleats, going in every which direction.  I got Stymied, Stalled... flat out Stopped in my tracks by the Fear of Getting It Right.  (If you don't understand what I'm talking about it, please don't tell me about it!)  ;D  So there it sat.  In the corner, partially cut, a few sample seams on scraps, my traced pattern which nearly got ruined by spilled spray starch, twitching, wilting, taunting me.... for nearly a year.   The copious amounts of rain we're getting this year finally motivated me into action!  And, par for the course when the game is called the Fear of Getting It Right (i.e., Perfection Issues), I finally found the path called Just Have Fun and Finish It Already!   Is it perfect?   Nah.   Is it good enough?  You betcha!

My previous post details a lot of the discoveries I made in working with this fabric, so you can check that out for fabric-specific info; this post will be about making up the Soho pattern.

Which I still love.  Love!  This pattern could be a heavy winter coat, a light Fall coat, a raincoat, even a robe ... the lines are simple but elegant, and whatever fabric you choose can define a variety of uses.   Because of its simplicity, it's easy to make minor, or major, changes for a completely different look.  And I think the lines make it very flattering to a wide range of figure types.

Have I mentioned yet how much I love this pattern?   I have sooooo many coat and jacket patterns, but I already have thoughts about making this up again.

Without further ado....here are some shots of the finished coat:
Some hood/collar variations -
here it's sort of rolled down.

Hood in relaxed position

Hood up


Hood down and flattened out.

Stealth Mode.
Close up of buttons


Some notes about the pattern:

  • If you just follow the instructions and don't make any changes, it's SO easy.   A lot of bang for the buck on this one!
  • The instructions, for the most part, are very very good.   The only thing that threw me off was the unusual shoulder seams, which are basically a V-shape (dart) cut into the front pieces between the hood & the rest of the front (the hood & front are together in one piece), and how the shoulder seam is attached to the back.   Just read through the instructions for this area carefully, and don't be confused by the fact that some stay-stitching around the dart is shown along with instructions to stitch a seam.   Do not do what I did, and stitch the dart together.   It isn't really a dart.   It's the shoulder seam.   Have I confused you?   Good, now I have company.  };-)
  • As with most Sewing Workshop patterns, this one runs large.   My measurements called for a largish Medium, but I cut a Small, and shortened both the sleeves (by about 2") and the length (by about 3").  It's still plenty roomy.
  • The first step you do is sew on the pockets, so you need to know where you want them right off the bat.  I had shortened the length above the pocket placement line by 1", but I still raised the pockets by an inch.
  • You also need to know where to place the buckle, or closure, if you follow the pattern.   I chose not to use their closure method, so I skipped this step.
Closure Details
I didn't really like the looks of the closure the pattern called for, so I waited until the end to figure out what I wanted to do.   Even then, I kind of made it up as I went along.
The twisty bits are sewn and turned thin strips that I twisted tightly until the strip folded back on itself.   To do this, you simply hold each end of a strip, and twist each end in opposite directions, like you're twisting a rope.   Once it gets almost too tight to twist any more, bring the ends together, hold them together in one hand, and the rest of the strip will automatically twist itself into a rope, as shown above.    Tighten or loosen the twist until you have the size loop you want, then sew the ends together to hold that shape.

Then I free-formed four triangularish shapes, sewed them right sides together & turned them.

I decided where I wanted the buttons, and sewed the twisty bits in place on the outside.

Then I covered the end of the twisty loop with one triangle, matched a second triangle on the inside for stability, and topstitched the two triangles together.   Pic above shows an inside (i.e., unseen) triangle on the left (rather messy looking, but as mentioned above, I was going for "good enough", not perfection!), and the outside triangle, which will be visible.

Other Construction Notes
The edge of the hood was VERY wavy after I was done, so I sewed a running stitch and gathered it up a bit, then top stitched the edge of the hood - just enough to make the edge sort of flat.   These pleats DO relax a bit after fussing with it, i.e., sewing and pressing.

I may still top stitch the side seams, in order to keep them flatter and neater looking.

Bottom Line?   Love the fabric, love the pattern.    Give me some more rain!

Friday, December 28, 2012

That Crazy-Pleated Nylon Fabric (Soho Coat)

Yes!  I'm back in the sewing room!  The major distractions of the past couple of months are (sort of) (I think) (maybe) under control now (she says hopefully), and I'm happily stitching away, and looking forward to much more of it in the coming days/weeks/year - Yippee!

The further good news is that the Sewing Workshop Soho Raincoat I started last winter (when we had NO rain) is realllllly close to being finished.   Several of you have asked about it, in no small part because you have the same fabric, and I suspect are using me as a guinea piglet to figure out just how the heck to work with it.   I don't mind....really, I don't.   Just give me a challenge!

Here's the fabric:

This is a water resistant nylon (or something like it), purple on one side, black on the other (it also came in green, and I think a blue and maybe an orange?).   Several of us bought yards of the stuff at Fabrix - I don't remember the cost, but it was a great price!   I immediately earmarked mine for the Soho Coat -  that's my next post (coming soon!).   Meanwhile, I thought I would make some notes as to what I found while working with the fabric.

Last year, when I started cutting the pattern out, and experimented with the flat-felled seams called for in the pattern, I went into minor freak-out mode trying to figure out how to get all those teensy little pleats to behave.   My angst, combined with the fact that we had NO rain last winter, resulted in everything being shoved into the corner, aka Area 51, aka UFOland.

When I dug it out again, I decided that angst just didn't work for me, so I put some comedy on the telly and just dove right in.  (I was listening to/watching the TED Talks Smart Laughs series on Netflix, but here's a link directly to some funnies on the TED Talks website - highly recommended...actually, pretty much any TED Talk is highly recommended by me).

What I discovered:

  • All those teensy criss-crossing pleats really aren't that hard to work with.   They're actually a combination of forgiving and challenging, so it sort of balances out.
  • Washable Wonder Tape is a miracle tool.   I've never really worked with it before, and I found it to be nearly perfect for this fabric.  Definitely better than Steam-a-Seam for this fabric!
  • Most of the pleats run crosswise (selvedge to selvedge), which means that most of the stretch is actually in the length.   If you're making a garment that requires more stretch across the body, I think this fabric lends itself perfectly to laying your pattern with the grain line laid selvedge to selvedge. 
  • Because of the crosswise pleating, I found that the fabric stretched a bit along the length, and I ended up shortening the sleeves and the overall length a bit more than I had planned on with the initial cutting.   Whether it stretches even more in the long run remains to be seen......  
  • Because of all the pleating, paying close attention to the grainline while cutting really isn't that important.
  • You can iron the fabric.  Pressing alone, without steam, isn't very effective, but it will hold a crease (at least for awhile) if you use steam and a medium hot iron.  However, doing so runs the risk of flattening some of the pleats enough to change the shape of your pattern pieces, so do it carefully....
  • I definitely suggest using a pattern that has simple lines and not a lot of tailoring.   That should be a no-brainer with this fabric, but knowing me, it's something I would try anyway!
Some of the details in pictures:


Sleeve seam - trying to press it open.
Not such a great result, with out risking flattening the pleats.


Same sleeve, with seam pressed to the side.
I opted to do a faux flat-felled seam on the sleeves
to keep the seam flat.
I think the topstitching here gives an example of both how challenging and how forgiving the fabric can be.  No matter how straight I tried to do my topstitching, it came out looking wavy in some places.....so I just quit trying so hard!  ;D


The edge at the bottom of this pic is supposed to be straight.
I cut it straight.  I swear I did.
But by the time I got to this stage, it was curved.
I don't know if this happened during the cutting stage, sewing stage, or pressing stage.
I solved it by simply pressing the folded edge straight and trimming the edge - it worked fine for this pattern. [whew!]


The Hemming Process, using Wonder Tape:
1.  I measured, folded, and press the hem at the hemline.
2.  I finger-pressed the Wonder Tape (WT) to the edge of the fabric.


3.  On the ironing board, I then folded under the edge (with the cover tape still in place on the WT), measured the hem depth, and pinned the edge in place.

4.  I pressed the hem, just enough to hold the creases in place, and removed the pins.


5.  I removed the protective tape from the WT, finger-pressed the WT in place, and added pins on the Right Side of the fabric.  I had already learned my lesson about top-stitching from the Wrong Side - being able to keep your eye on the pleats is very helpful!
I hope this helps give some hints to others who are working with this fabric - and if you've already used it, please stop by and add your thoughts!

Finished Soho Coat post will be coming this weekend :)

Monday, December 10, 2012

Covered Washers/Pattern Weights Tutorial


There are a whole slew of tutorials on making these pattern weights, so yet another might be overkill, but hey, it's my blog and I can do it anyway.  ;-D

I've used large washers as pattern weights for some time, but I always thought it would be nice to pretty them up a bit.  At the greedy gift grab I just attended I saw THE nicest covered washer pattern weights ever, made by the talented (but blogless) Sue Krimmer, whose gorgeous wool felt hats I mentioned in this post on last Fall's Artistry In Fashion.   I was, at last, inspired to make my own.  Covered washers, not hats.  (not that I wouldn't LOVE to make hats.....someday.....)   I should mention that Sue's weights were one of the most stolen and sought after items in the gift grab - they were pretty awesome!

I took a trip to the hardware store to expand my supply of washers.   Actually, 2 hardware stores.  If you have a local store that's well supplied with goodies, just go there first and ignore the big box chains.  Just trust me on this one; I will say no more...

What you'll need:
  • Metal Washers.  Minimum size of 2", up to 4", or even larger if you want.  (I used 2" - 3.5")
  • Glue to double your washers together (or even triple the smaller ones, if you want)  I used some E6000, and some Devco 60 second Epoxy, just because that's what I had on hand.* 
  • Ribbon, fabric strips, bias tape, grosgrain, yarn.....whatever you feel like playing with to cover the washers.
  • Glue to finish off the ribbon.  I understand that Liquid Stitch is a good choice; I used Formula 77, just because that's what I had on hand, and it worked well.  (I sprayed it on some paper, then dabbed it onto the ribbon with a toothpick)
  • Scissors and Pins**

*Note on the Glue:  You want something to hold the washers together firmly, and several people recommended the E6000, but it may be overkill.   This stuff is potent!!! (use it outside).  You also need to let it set for awhile.  I had some Devco 60 Second Epoxy as well, so I used that up.  It sets up quickly, but I think it's pretty wasteful and expensive.   Once the washers are wrapped up, I think they'll hold together pretty well, so I really think that any glue that's meant for metal will be fine.
**Note on Pins:  You may want to use old ones - since you'll be pushing them through glue, you may not want to use them on fabric again.

Washers (already doubled and glued)
and some vintage trim from stash.
Simply lay your ribbon on the washer and start looping it around.  I find that the 2" washers take less than 2 yards of ribbon, and the larger ones take less than 3 yards, more if you're using really thin ribbon, or yarn.

Once you've wrapped all the way around, cut the ribbon.  I cut mine so that they would end on the inside of the circle, and be less visible.  I folded over the end of the ribbon, glued the fold, then glued the end on the inside circle.  I then pinned the end in place until the glue dried.
Ribbon Pinned in place.
Finished Pattern Weights
I think that ribbon with a pattern of some sort works better than solid.  You'll notice that I embellished (what, me?  Embellish??) the solid ones with extra ribbon or yarn.

All I bought for this project was a few more washers; everything else was from stash, mostly "yard sale vintage".  I loves me a good old estate sale where a seamstress lived - you can nearly always uncover some wonderful treasures for pennies :)

More than once I've ripped a bit of pattern tissue with my uncovered washers, so this not only softens the edges of the metal washers, but the fabric and the weight of the doubled washers holds the patterns in place better.   And they add some fun and color to your work space!   For something so quick and easy, this is definitely a win win win!

And in keeping with the season, as a bonus, you could whip a few of these up as a gift for your favorite sewist  :)


Saturday, December 8, 2012

The Endless Tube Scarf and some Greedy Gift Stealing

Two years ago (pre-blog) I made several scarves based on the recipe from Threads Issue (November 2001, Issue #97).  I just made another one for a gift grab soiree, and with the holidays upon us, it seemed a good time to blog about it.  Not only does it make a unique and functional gift, but it's a great way to use up scraps (and come on now, who can't use a good reason to reduce that container filled with scraps-that-are-just-too-good-to-toss)!

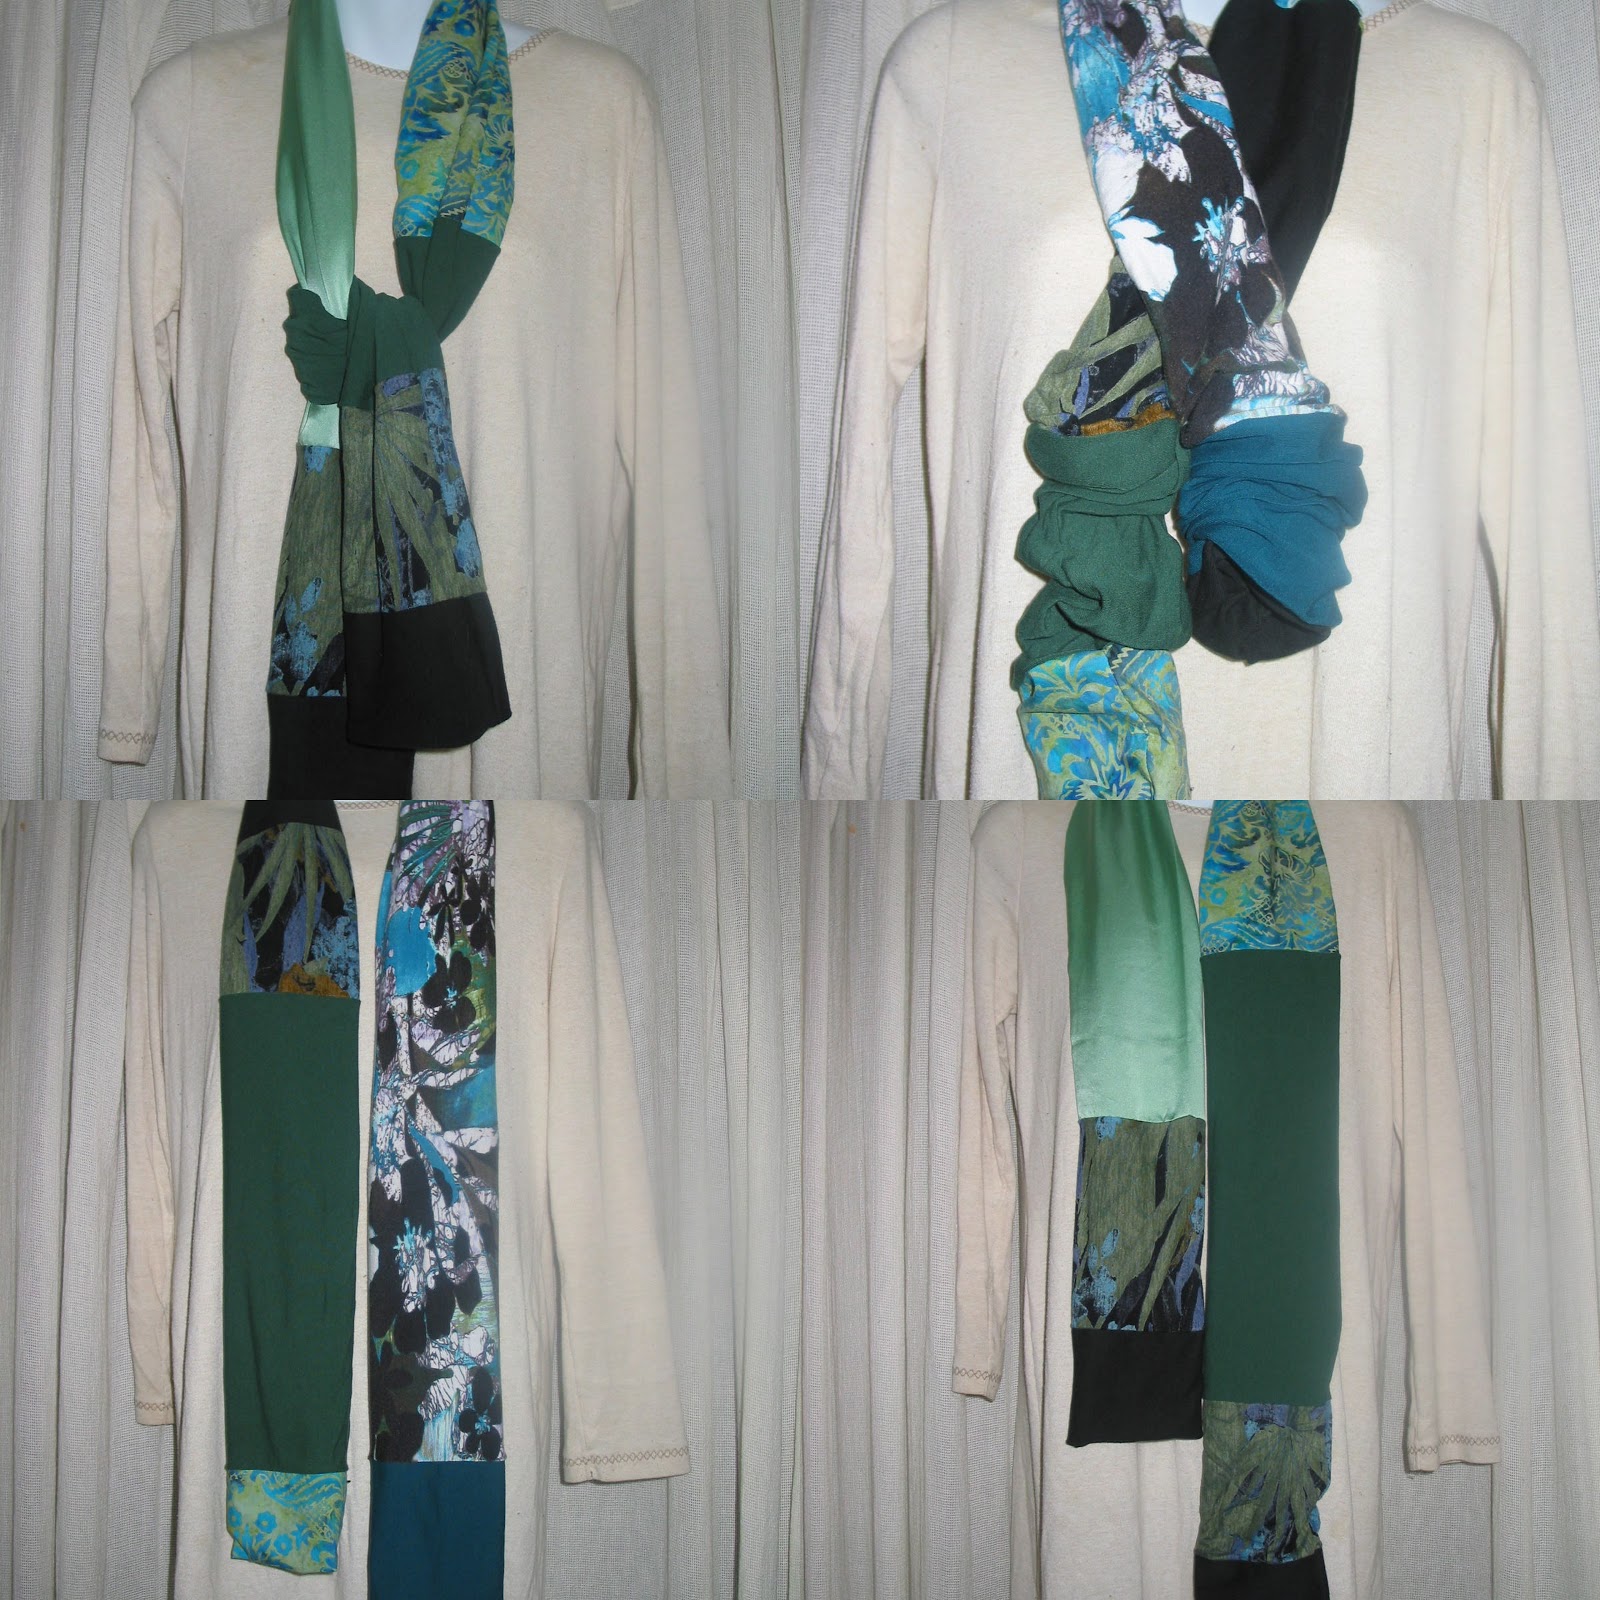
The beauty of this design is that the looks you can achieve are endless!  Starting at the finish line, here's the scarf I just made:
Fully Extended:

All Scrunched Up:

Several Views of a scarf made from Knits
These are all the same scarf; the shots give an idea of how 
much variety you can get from one scarf!:

Cut and sew scraps of fabric together, so that you end up with a circle.  
Remember that final scarf will be half the  dimensions you start with.
In this case, the pieces were about 18" wide, and once pieced together, 
the total length was about 9' long.
This will give a finished scarf of about 8" x 4.5'


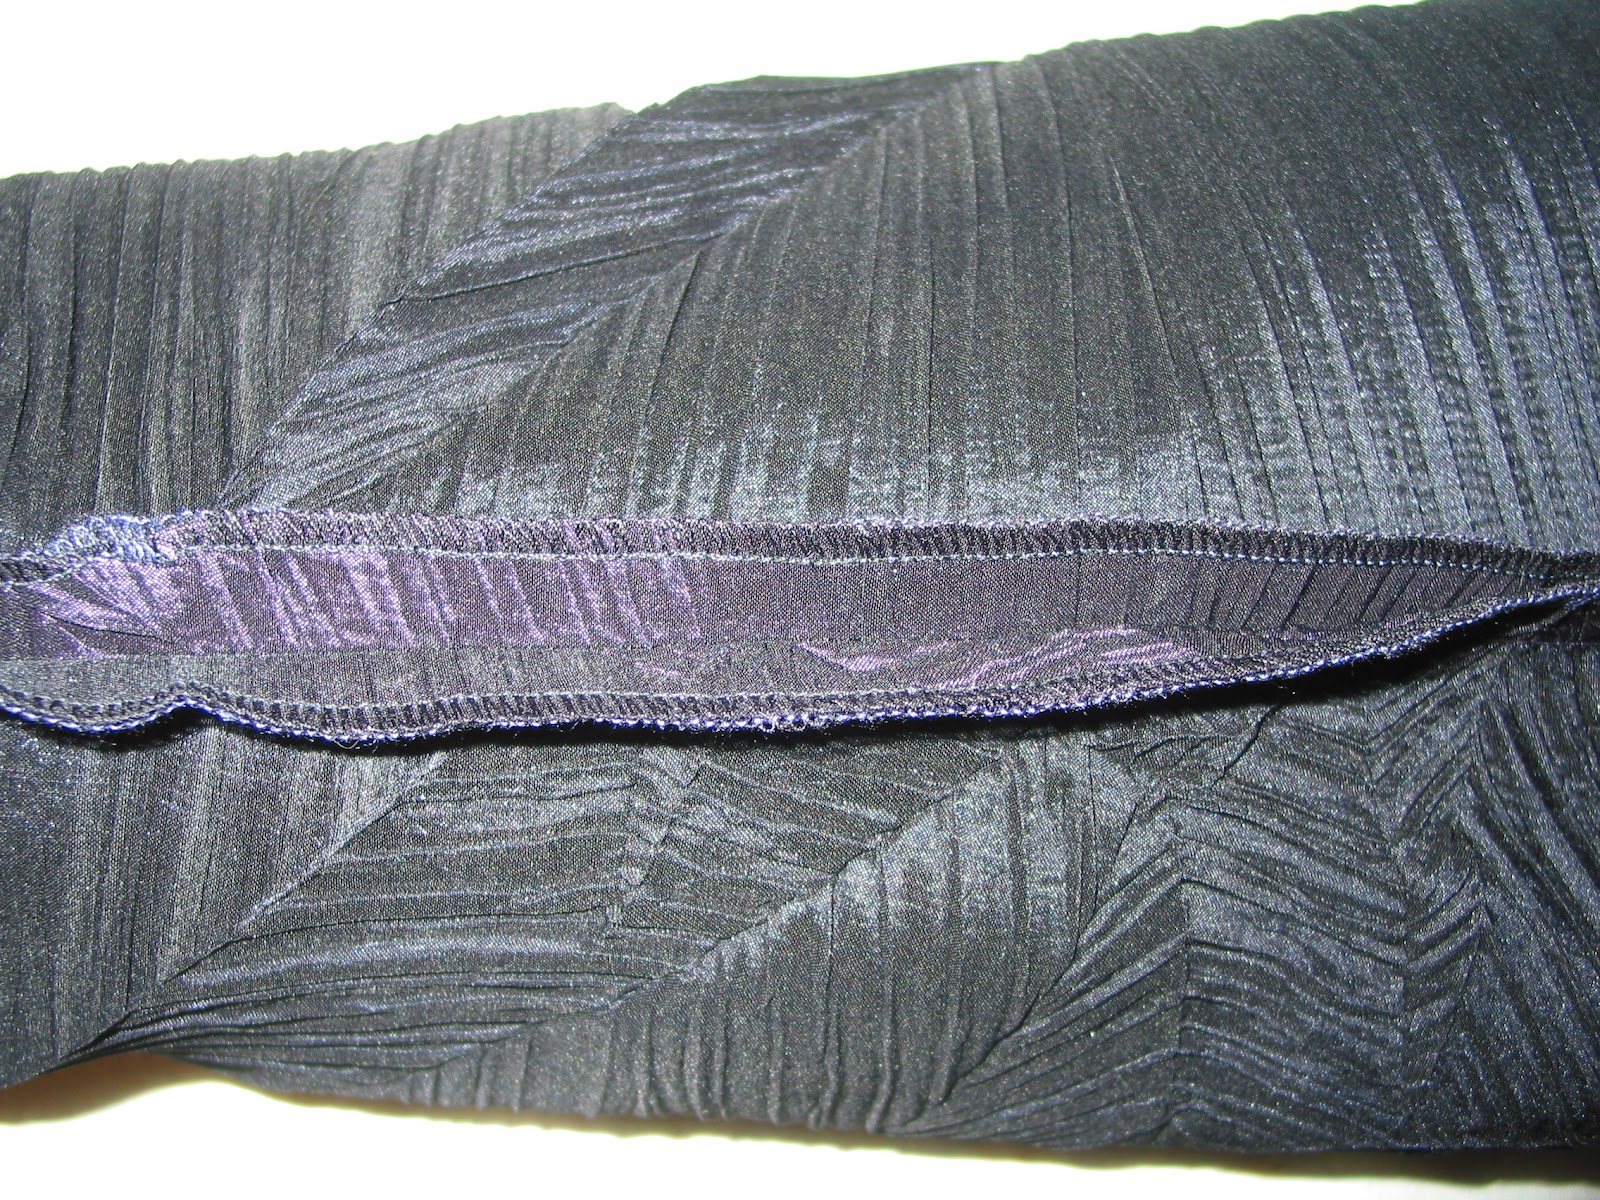
 NOTE:  This scarf used a number of fray-prone fabrics, so I used French seams, which required a bit of forethought (and a small amount of unpicking) while piecing it together.

Unfortunately I don't have photos of the final steps, so hopefully the words will suffice.  If I make another one (and I think I will), I'll try to document the details in pictures.

Fold your scarf in half lengthwise, RS together and stitch, leaving an opening large enough to reach in and turn the scarf right side out.    Reach through the opening, pull the scarf RS out, hand stitch the opening, and you have a scarf with endless possibilities!

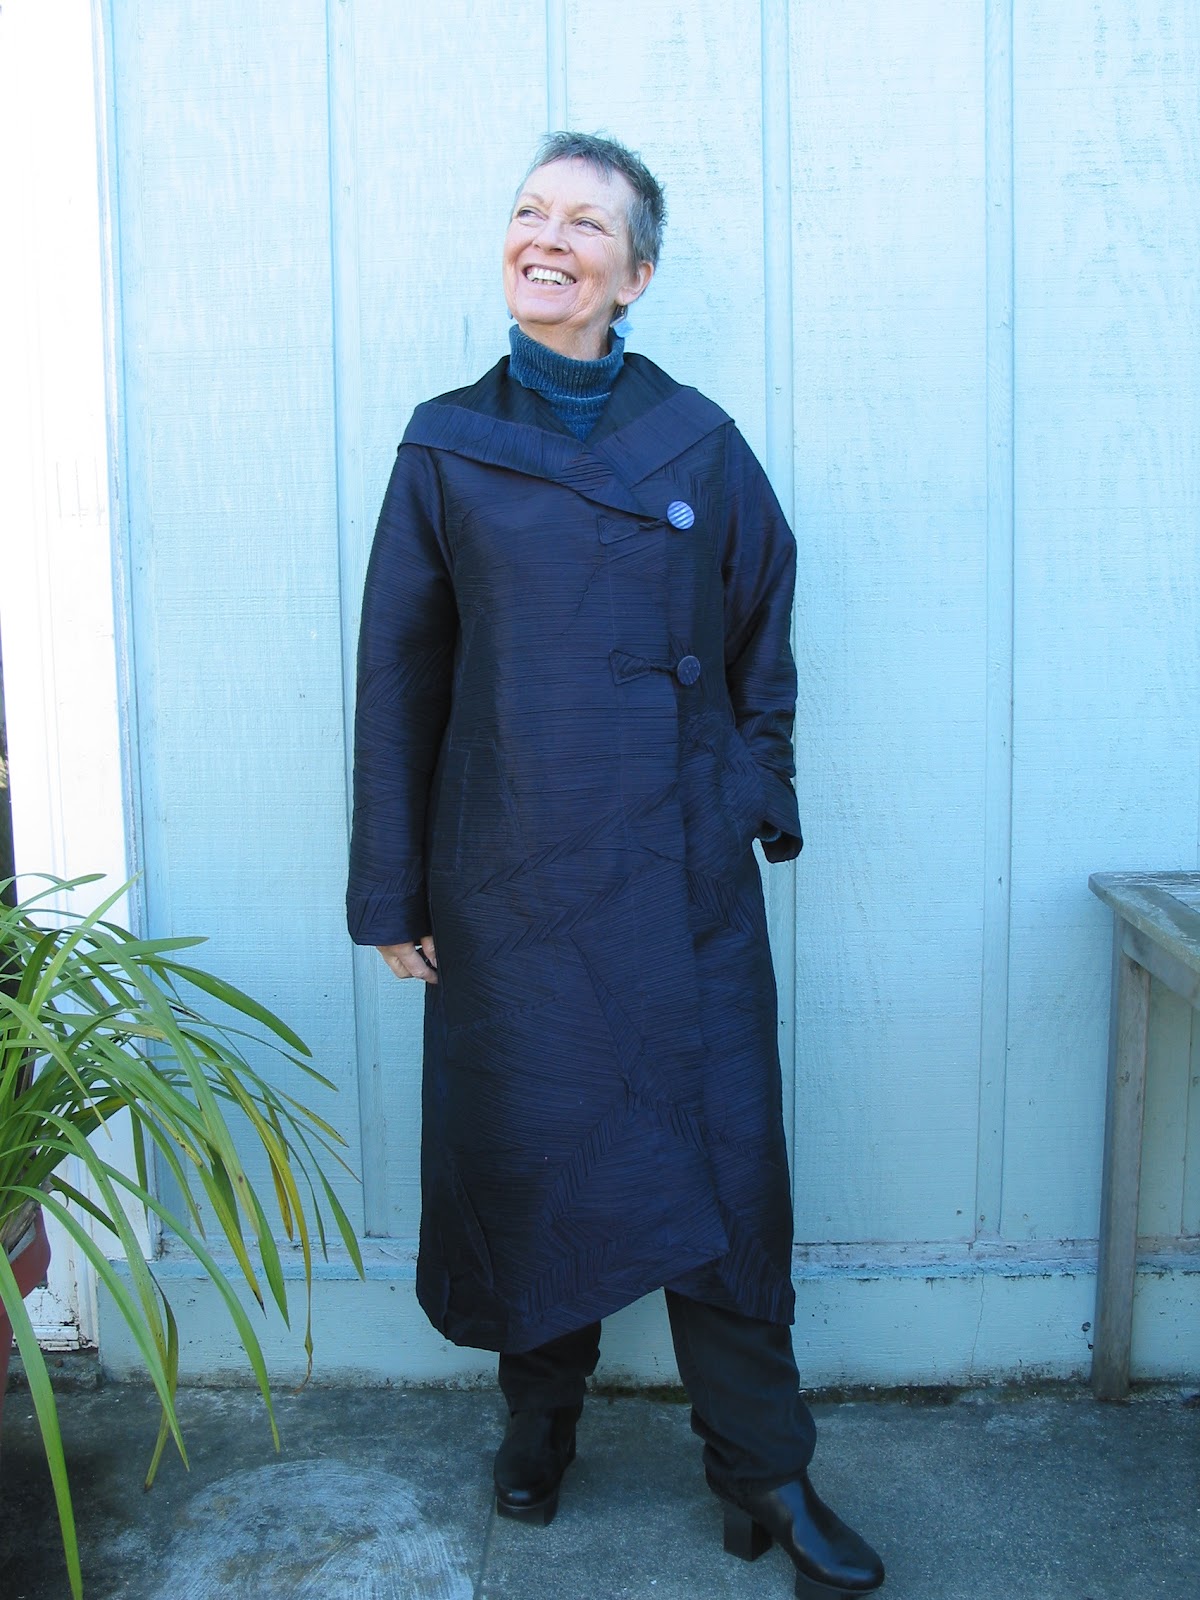
Some Random Notes:  Silk is always a yummy option for a scarf, but I've found that you can't get the scrunchy look to stay in place with silk.  Knits will hold the scrunch very well.  For the black and white scarf, I used a variety of fabrics:  Silk, Silk/cotton blend, cotton/nylon blend, and a heavier brocade - the brocade gave it the "oomph" to hold the shape if you want a scrunchy look.

Regarding gifts, I have to say that my Very Favorite gift-sharing gathering is a white elephant or gift-stealing sort of event, where the guests draw a number, and gifts are opened one at a time, starting with #1, and subsequent numbers can either open a new gift or steal one that's already been opened.  Politeness and gentility have no place in such an event!

Last night I had the pleasure of attending a sewing-related gift grab, where laughter was abundant and the gifts (most of which were lovingly handcrafted) were ah-MAY-zing!   My b&w scarf was my contribution, and I went home with this bundle of delight, assembled by Mary Lou:
A lovely pincushion, some "fork" pins, a variety of very nice ribbons, a very nice linen cloth, all packed in a special round box, with a pair of Gingher Pinking Shears!  My beloved old (and I do mean OLD - at least 70 years) Wiss pinkers have served me well, but even a professional sharpening could not fully repair the abuse these have been through.

 I have it on very good authority that a charming and well-mannered rambunctious young child consistently needed wanted to use her Mother's pinkers to express her creative vision crazy ideas, and yards....perhaps miles....of paper and who-knows-what-else were lovingly viciously sliced with these scissors.  So a fresh new pair is very welcomed!

And, IMHO, it isn't possible to have too many pincushions!  I also can't wait to try those "fork" pins - they look intriguing!  I'll report on their effectiveness when I've had a chance to use them.  :)

My sewing motivation is definitely in high gear right now, so I'm going to go get lost in the sewing room for awhile :)

Are you sewing gifts lately?   Do you have any great ideas for fabric scraps?  (Now is definitely a good time to blog about them, if you do!)

Tuesday, December 4, 2012

The Wonderfulness of Simple (aka my Holiday Top)

I'm not entirely sure how this pattern ended up in my stash, because it's, shall we say, not a style I'm normally attracted to.  But when I was looking for a simple pattern for a woven holiday top, this was the only pattern I had that filled the bill, so I'm glad I have it!

New Look 6808:

I whipped up a quick muslin of View A, with the 3/4 sleeves, and found out that it really is what they claim:  easy!   And the fit is quite nice...I may need to take a closer look at some other New Look patterns :)   I did do my usual alterations - forward/sloping/narrow shoulders, and sizing out at the waist and hips.   And I discovered a new adjustment for a gaping neckline, detailed here in my previous post.  

The pattern calls for a side zipper, but I really questioned just how helpful that would be, and definitely did NOT want to install a zip in my fabric choice, so I was relieved when just a tiny bit of contortionist wiggling allowed me to get the muslin on.   I ended up not adding the waistline darts in the final, because of my fabric choice.
Unknown fabric content (Note:  MUST keep better records!)
Note #2:  KC has this fabric as well, and she came to the rescue with her notes, indicating that the fabric is a rayon and/or cotton blend with some nylon.
The base is white, with black circles & squares woven in,
and sheer nylon cutouts throughout.
The left side of the pic shows the fabric laying on a piece of white fabric; it's laying on top of a black piece on the right side.
LOVE this fabric!
I changed a few other construction details because of the sheer bits in the fabric, and because it is very fray-prone.   I made a bias binding for the neckline, French seams at the shoulders, and doubled the fold at the hemline.  I really should have done French seams at the sides as well, but I wanted to have the option to shape, if necessary.   Shoulda coulda woulda.....  I had already discovered that this fabric WILL fray over time, and those loose threads WILL show through the sheer bits in places like the hem/facing at the sleeve end.   I opted to let it be one of those "it is what it is" cases, rather than unpick.  Occasionally time restraints trump perfectionism.

I will try this pattern again, and use the darts if I want a more fitted look.

Enough words....here are the results:

The more Casual Look:

Dressier, and Tucked In:


What I like about this pattern:  Very nice fit that's adjustable with the darts, my favorite sleeve length, with a little touch of uniqueness at the sleeve hem, a neckline that works well for me, and everything is simple enough to be altered very easily.   Definitely a winner!

What I like about the top I made:   The fabric!!!  LOVE this fabric!  It can be dressed up or down, and I think this particular combo of white/black & shading is good on me, which is REALLY nice to find, because I love black and white, but often have a hard time finding shades that love me.

Lessons Learned:  
  • A gaping neckline can be fixed pretty easily - Yay!
  • If you know your fabric is fray prone, plan on french seams or binding the SA's ahead of time.  Just do it already.
  • A pattern with simple lines can be golden - sometimes you need to look beyond what's on the pattern envelope - the cheesy fabric prints & cutesy ruffles and bows - and see the great bones that hold it all together :)  (Note:  Please don't take offense if you DO like cheesy fabric prints & ruffles & bows....eye of the beholder & all that...   And truth is, I DO like those things on some people; just not me) ;-)
Now, I'm off to do a bit of gift sewing...but first, I'll leave y'all with this:

Happy Holiday Crafting, for those of you who are not taking it easy in the next few weeks....

Sunday, December 2, 2012

Cat Bites, Not Sewing, and The Gaping Neckline

First, may I smile a great big "Thank You" to those wonderful readers who e-mailed me checking in to make sure I was OK after such a blogging absence - it means a lot to know that someone (at least 2 of you) actually noticed!  ;-D

I've not been blogging partly because I've simply not been sewing.  I would love to say that it's because life has been so fantastically busy because of the bustle of the holidays and other wonderful activities, but...well....it's just been life.  It gets that way sometimes.

I was actually in the middle of cutting out a muslin about a week ago, when my no-longer-such-a-darling kitty sank his teeth into my hand & destroyed any possibility of holding a pair of scissors for several days.   Blood.  Pain.  Antibiotics.  And not the first time this has happened in the past few months.  He has issues.   Not his fault, behaviorally, but whatever's causing this behavior has, so far, been a mystery to his vets, and right now I can't even go into the emotions that are coming up with the choices in front of me :(
In Better Times.....

At any rate, the hand, although not completely healed, is functioning again, and best of all I'm BACK IN THE SEWING ROOM!   (sorry for yelling, it's just so exciting!)

Which brings me to the Gaping Neckline.
Yes, that gaping neckline...

This is not the first time I've come across this problem, so it dawned on me that I should probably learn how to deal with it.   I think it has to do with a combination of narrow shoulders and a hollow upper chest.  Hollow upper chest?   Seriously?   Who knew????  The body oddities we discover when we start to sew....

So I read up here & there on some solutions, and decided to try this:
(hope this is clear enough)  I put a dot at a somewhat arbitrary bust point, and drew 2 lines - one to the neckline, and one to the side seam - (sorry about the picture quality; if you can see them, the lines are in red).   In this case, I drew the line to the side seam above the bust dart, since my actual bust point is a bit lower than the pattern dart's bust point (no surprise there...)

I then cut along the lines, from the pattern edge almost to the arbitrary bust point, creating a "hinge", and rotated the cut piece towards the CF, so that the neckline area lapped by 1/4" (which removes a total of 1" of fabric from the neckline), with a corresponding gap created at the side seam.


I cut a new muslin piece, basted it on, and Voila!   No more gap!!!!

And this, my dear readers, is one of the reasons I love to sew - clothes that fit!   I still get delighted and amazed each time I discover something new like this :)

Here's a sneak peak at the material that will be used.  It has sheer bits - the left side is placed over white fabric; the right side has black fabric underneath.   I'll muslin the sleeves tonight, and if all goes well with them, it should sew up very quickly :)

Oh goodie, it's so nice to be back in the sewing room, and back in the blogging world as well.  And even though I haven't been commenting much on your blogs, I've at least been skimming to try to sort of kind of keep up - know that I've been thinking of you. :)